/ 6 min read
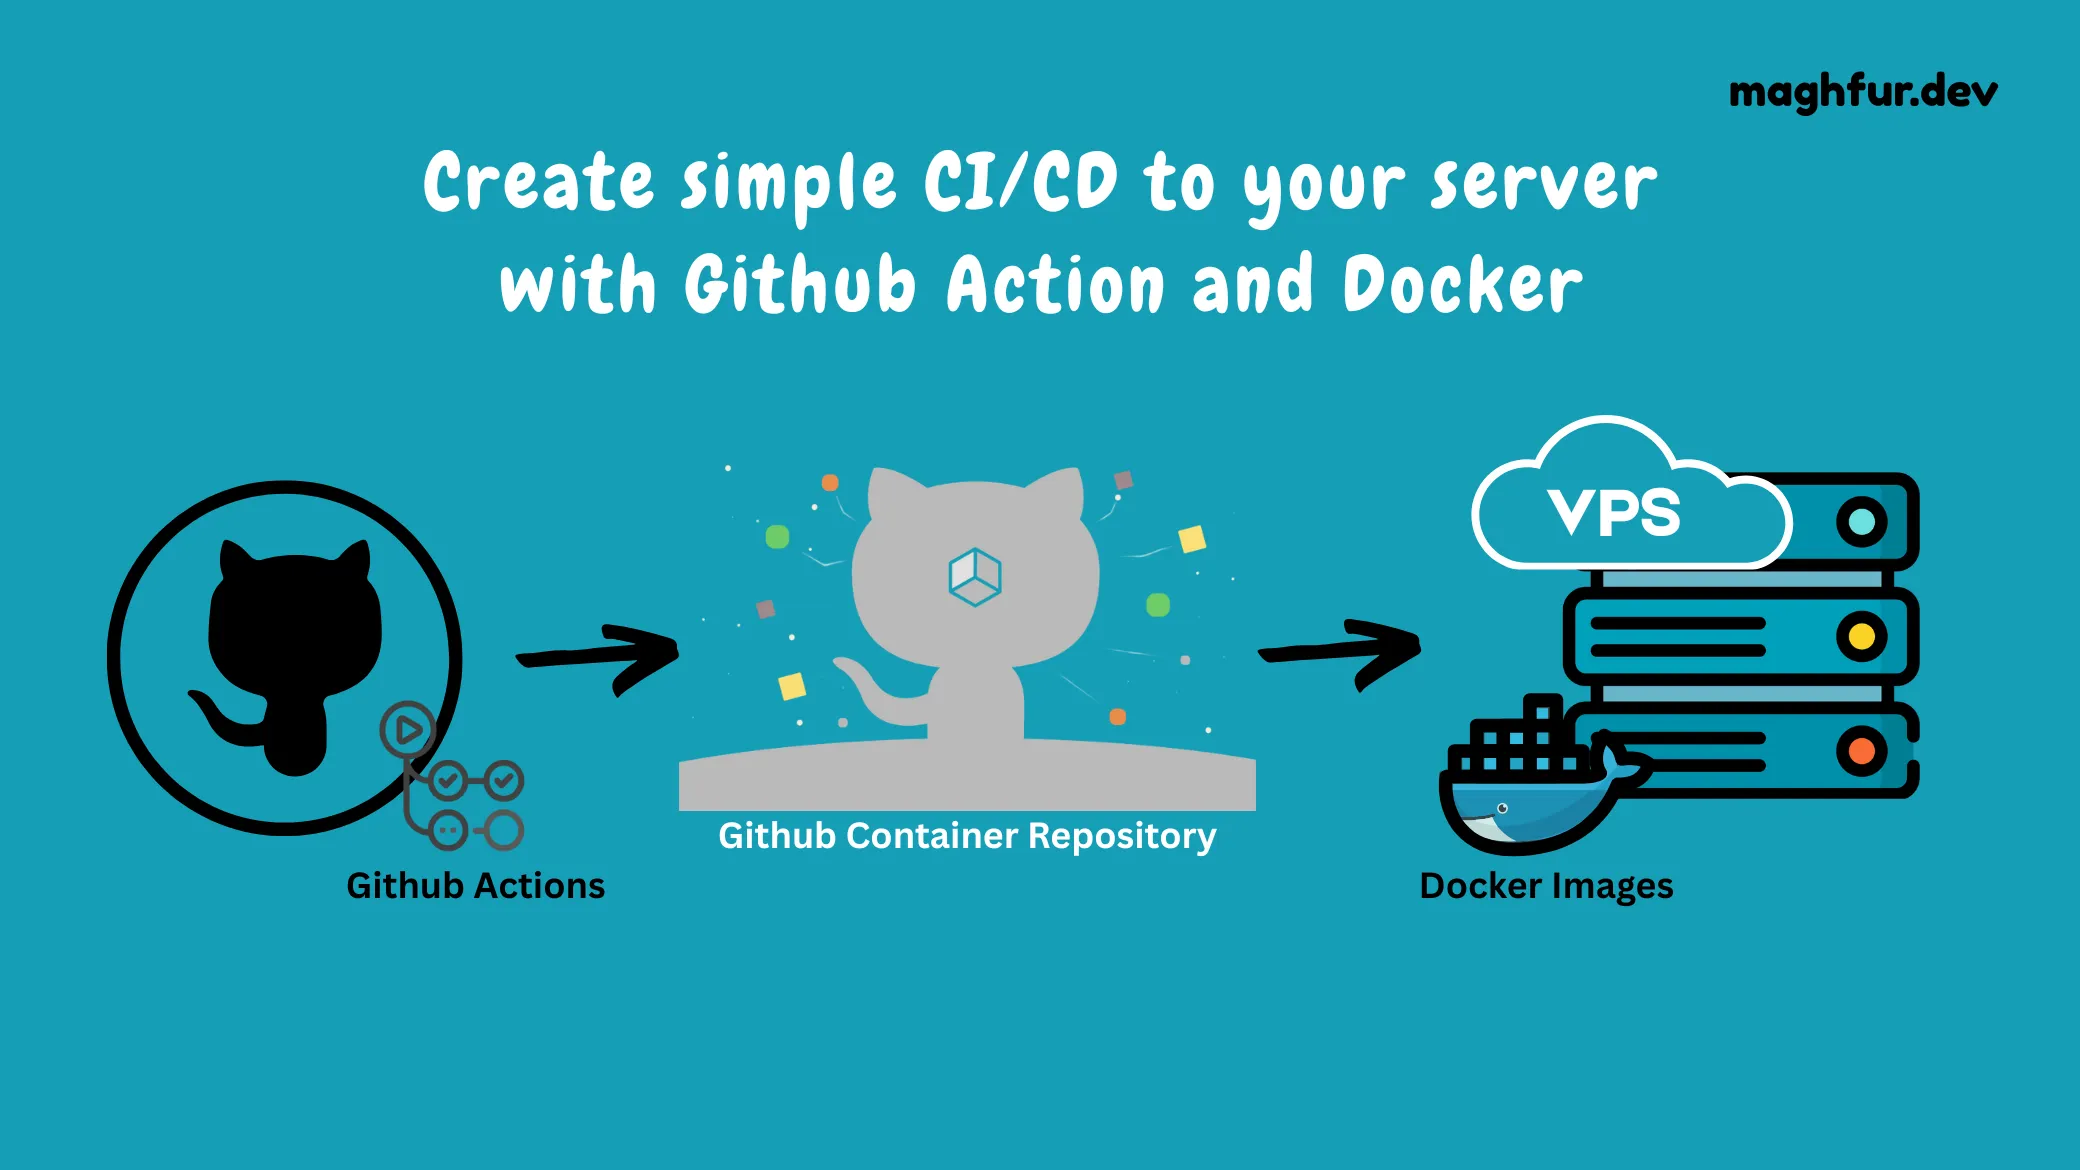
Create simple CI/CD to your server with Github Action and Docker
Last Updated:
If you’re building and deploying applications with Docker, setting up a CI/CD pipeline can make your life a lot easier. In this guide, we’ll show you how to use GitHub Actions to automate building your Docker image, push it to the GitHub Container Registry (GHCR), and run it on a Linux-based server using Docker.
Why go through all this? Automating the build and deployment process ensures consistency, saves time, and eliminates a lot of the manual work and potential mistakes that come with shipping software. By the end of this tutorial, you’ll have a working CI/CD setup that lets you deploy new versions of your app with just a git push.
Prerequisites: What You Need Before Starting
Before diving into setting up your CI/CD pipeline, make sure you have the following ready:
-
Project Repository
A GitHub repository where your application code lives. We’ll use GitHub Actions directly from this repo to automate the pipeline.
-
Private Server (Linux)
You’ll need access to a Linux-based server where you’ll deploy your Docker container. This could be a VPS, cloud VM, or any other remote machine you control.
-
Docker Installed on the Server
Since your app will run inside a Docker container, make sure Docker is installed and running on your server. If you haven’t installed it yet, here’s the official guide to get Docker up and running.
Step-by-Step Guide: Building the Pipeline
-
Open your repository and create a
Dockerfileand adeploy.ymlfile.-
The
Dockerfilewill contain the instructions to build and run your application inside a Docker container.Example:
// using your configuration// get module golang alpine from docker containerFROM golang:1.22-alpine// work directoryWORKDIR /app// command for download moduleCOPY go.* ./RUN go mod downloadRUN go mod verifyCOPY . .// command for running service in docker imagesRUN go build -o main ./main.go// port we use forEXPOSE 3000// command for running serviceCMD ["./main"] -
Create
deploy.ymlfile inside the.github/workflowsfolder. If this folder doesn’t exist yet, create it manually. Add the following code to yourdeploy.ymlfile:# name your workflowname: sample-cicd# trigger your workflowon:push:branches: masterjobs:# define job name in github actionbuild-and-deploy:# define environment where the job will run (ubuntu-latest)runs-on: ubuntu-lateststeps:# Checkout code in the workflow's workspace so that it can be used by later steps (actions/checkout@v3)- name: Checkout codeuses: actions/checkout@v3# set up Go environtment (actions/setup-go@v4)- name: Set up Gouses: actions/setup-go@v4with:go-version: 1.22# set up docker buildx (docker/setup-buildx-action@v3) to create a new builder and use it to build and push the image- name: Set up Docker Buildxuses: docker/setup-buildx-action@v3# Login into Github Container Registery (GHCR)- name: Login to GHCRuses: docker/login-action@v3with:registry: ghcr.iousername: ${{ github.actor }}password: ${{ secrets.GHCR_TOKEN }} # GitHub Container Registry token# build and push image (docker/build-push-action@v5) to push the image to the GitHub Container Registry- name: Build and Push Imageuses: docker/build-push-action@v5with:context: .file: ./Dockerfile # Dockerfile pathpush: truetags: ghcr.io/${{ github.repository }}:latest# deploy the image from GHCR to our private server using SSH login- name: Deploy to serverwith:host: ${{ secrets.SSH_HOST }}username: ${{ secrets.SSH_USER }}key: ${{ secrets.SSH_KEY }}script: |docker stop ${{ github.event.repository.name }} || truedocker rm ${{ github.event.repository.name }} || trueecho ${{ secrets.GHCR_TOKEN }} | docker login ghcr.io -u ${{ github.actor }} --password-stdindocker pull ghcr.io/${{ github.repository }}:latestdocker run -d --name ${{ github.event.repository.name }} -p 3000:3000 ghcr.io/${{ github.repository }}:latest
-
-
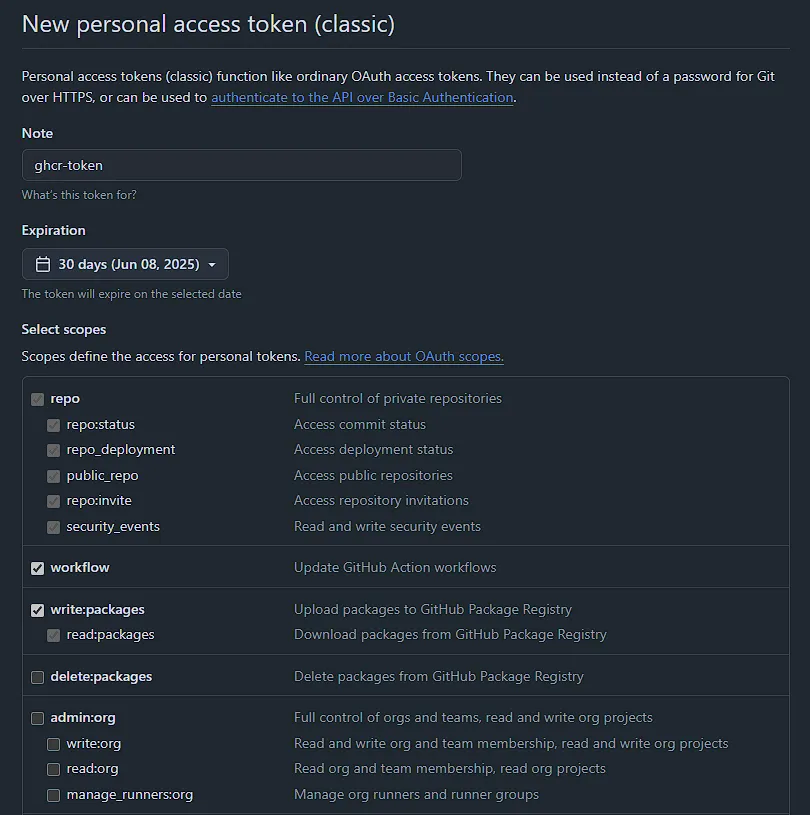
Create a personal access token to allow access to the GitHub Container Registry (GHCR).
Go to GitHub Settings > Developer Settings > Personal Access Tokens > Tokens (classic) and click Generate new token (classic).
🔗 Link: https://github.com/settings/tokens
When generating the token, make sure to select the following scopes:
repoworkflowwrite:packages
After selecting these, click Generate token and copy it—you won’t be able to see it again.
-
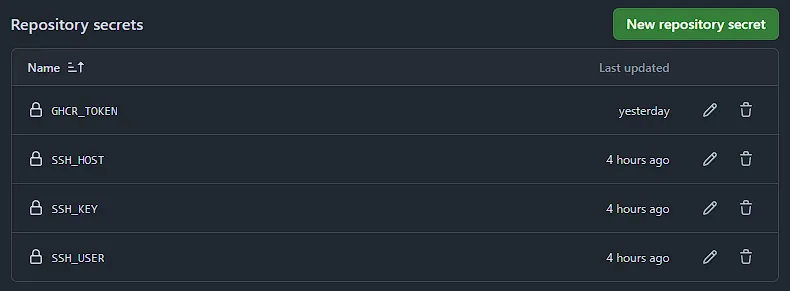
Save your GHCR token to your repository secrets.
Go to your GitHub repository, then navigate to:
Settings > Secrets and variables > Actions > New repository secret.
Add your secrets there—such as your GitHub Container Registry token—just like shown in the example image.
🔗 Link (replace with your actual repo):
https://github.com/your-account/your-repository/settings/secrets/actions
For
SSH_KEY, you can generate an SSH key from your local machine (PC or Laptop) and add the public key (.pub) to your server. Follow the guide below:- Open your terminal and run the following command to generate a new SSH key pair:
Terminal window This will create two files:
-
A private key (usually located at
~/.ssh/id_rsa) -
A public key (usually at
~/.ssh/id_rsa.pub) -
Once you’ve generated your SSH key, copy the private key to your GitHub repository secrets under the name
SSH_KEYYou can use the following command to display your private SSH key (make sure you’re in a secure environment):
Terminal window cat ~/.ssh/id_ed25519⚠️ Important:
Never share this private key publicly. Only paste it into your GitHub Secrets under:
Settings > Secrets and variables > Actions > New repository secret
with the name
SSH_KEY. -
Send your public SSH key to your server using the following command:
Terminal window ssh-copy-id -i ~/.ssh/id_rsa.pub user@your-server-ipReplace
userwith your server’s username (e.g.,rootorubuntu), andyour-server-ipwith your actual server IP address.This command will append your public key to the
~/.ssh/authorized_keysfile on the server, allowing passwordless SSH access.
-
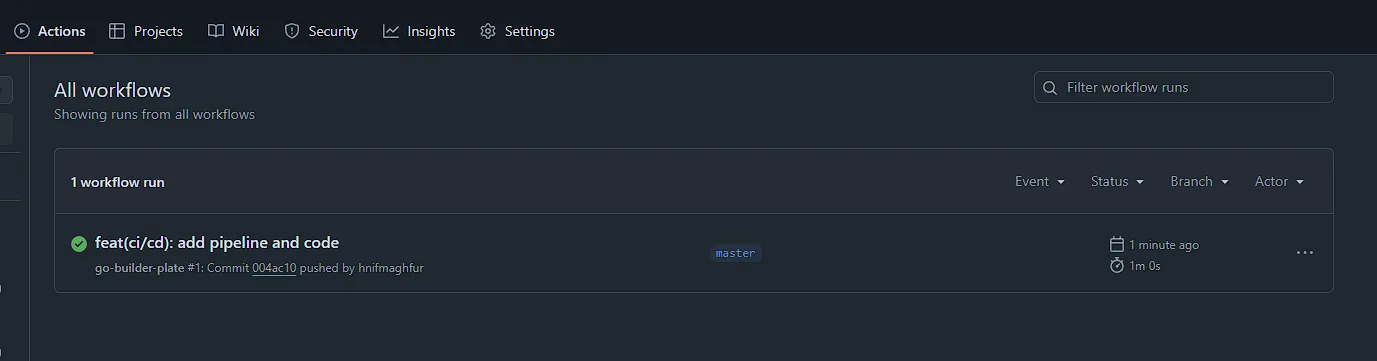
Push your
Dockerfileanddeploy.ymlfiles to your GitHub repository.After pushing the files, go to the Actions tab in your repository, and you should see your workflows running, like in the screenshot below:
-
Once the workflow completes successfully, your service should now be running and publicly accessible.
Example Project
You can view the complete code and configuration in this repository:
🔗 https://github.com/hnifmaghfur/simple-pipeline-cicd
Conclusion and Next Steps
By following these steps, you should now have a working CI/CD pipeline using GitHub Actions and Docker. This pipeline will automatically build and deploy your Docker image to your server whenever you push changes to your repository.
This pipeline is a great starting point for automating your development workflow. You can customize it to fit your specific needs and requirements. For example, you can add more steps to your workflow to run tests, lint your code, or send notifications.
You can also explore other GitHub Actions features, such as:
- Using GitHub Actions to automate your testing and deployment workflow
- Using GitHub Actions to automate your continuous integration and continuous deployment (CI/CD) pipeline
- Using GitHub Actions to automate your code review and approval process
With GitHub Actions, the possibilities are endless. You can automate any task that you can think of, and make your development workflow more efficient and reliable.
I hope this guide has been helpful in getting you started with GitHub Actions and Docker. If you have any questions or need further assistance, feel free to ask.